Contributor's Guide
Last updated: September 10th, 2026
Step 1. Receive an invitation
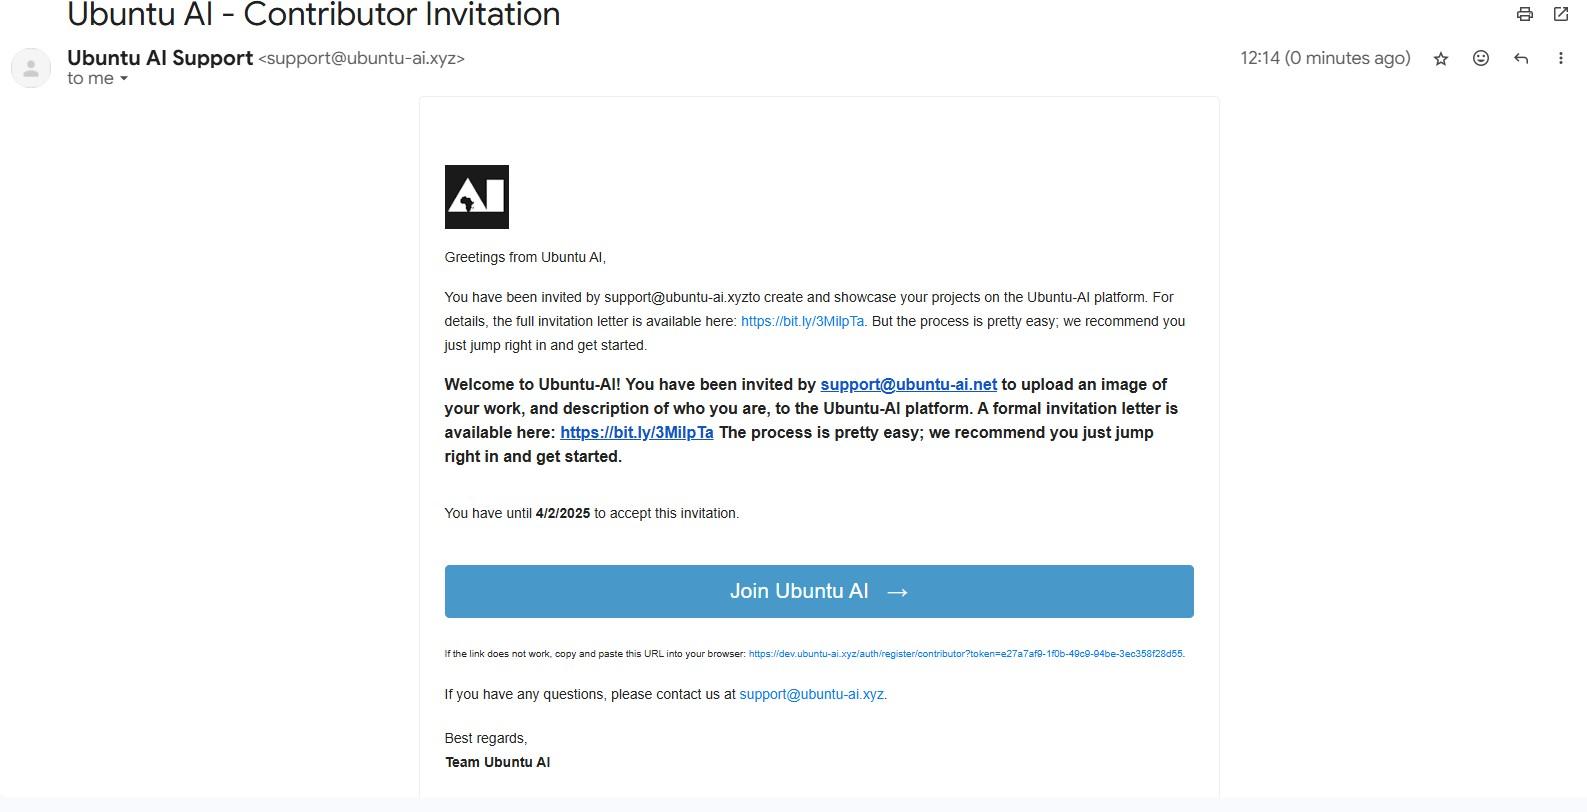
Upon receiving the contributor invitation in your email, click the Join Ubuntu AI link to register as a project contributor.
Step 2. Register as a project contributor
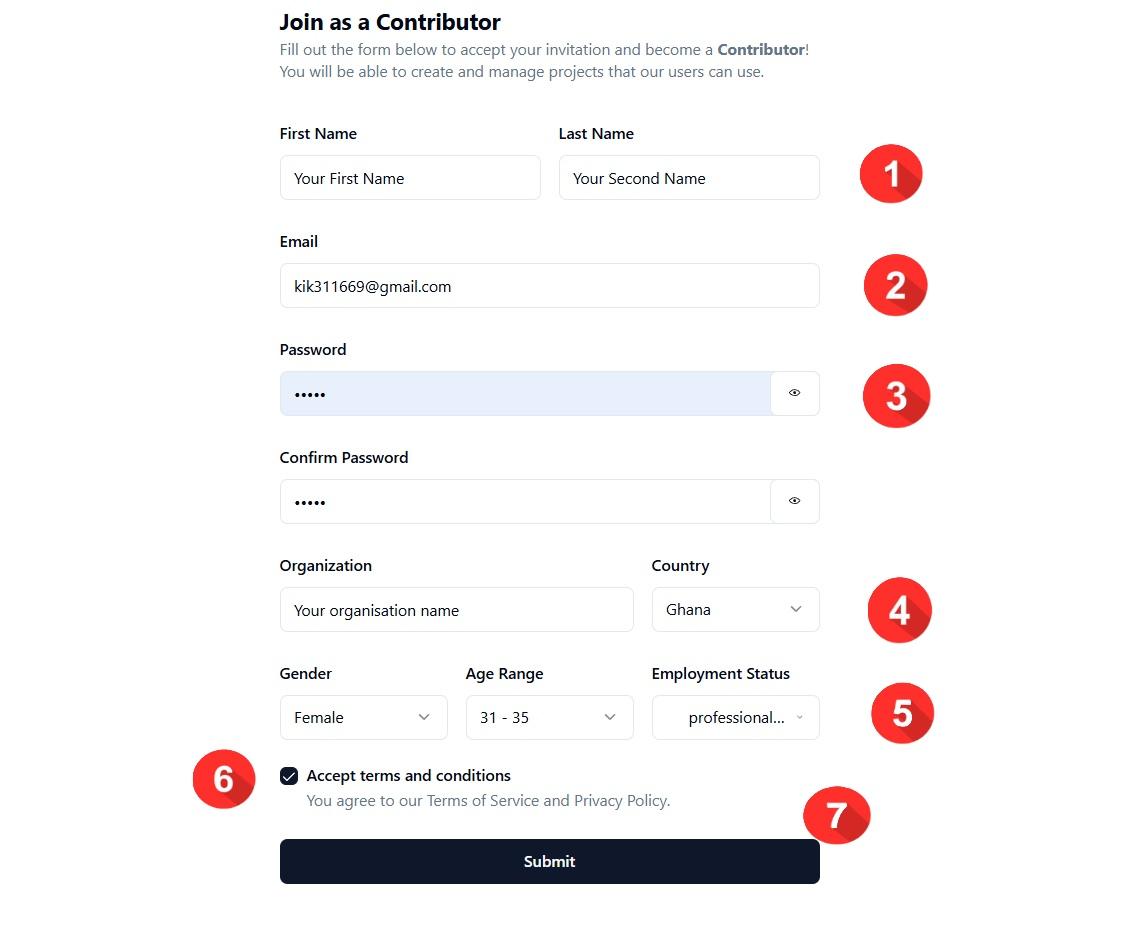
Fill in the registration details and click the Submit button.
Step 3. Navigate to the Admin Dashboard
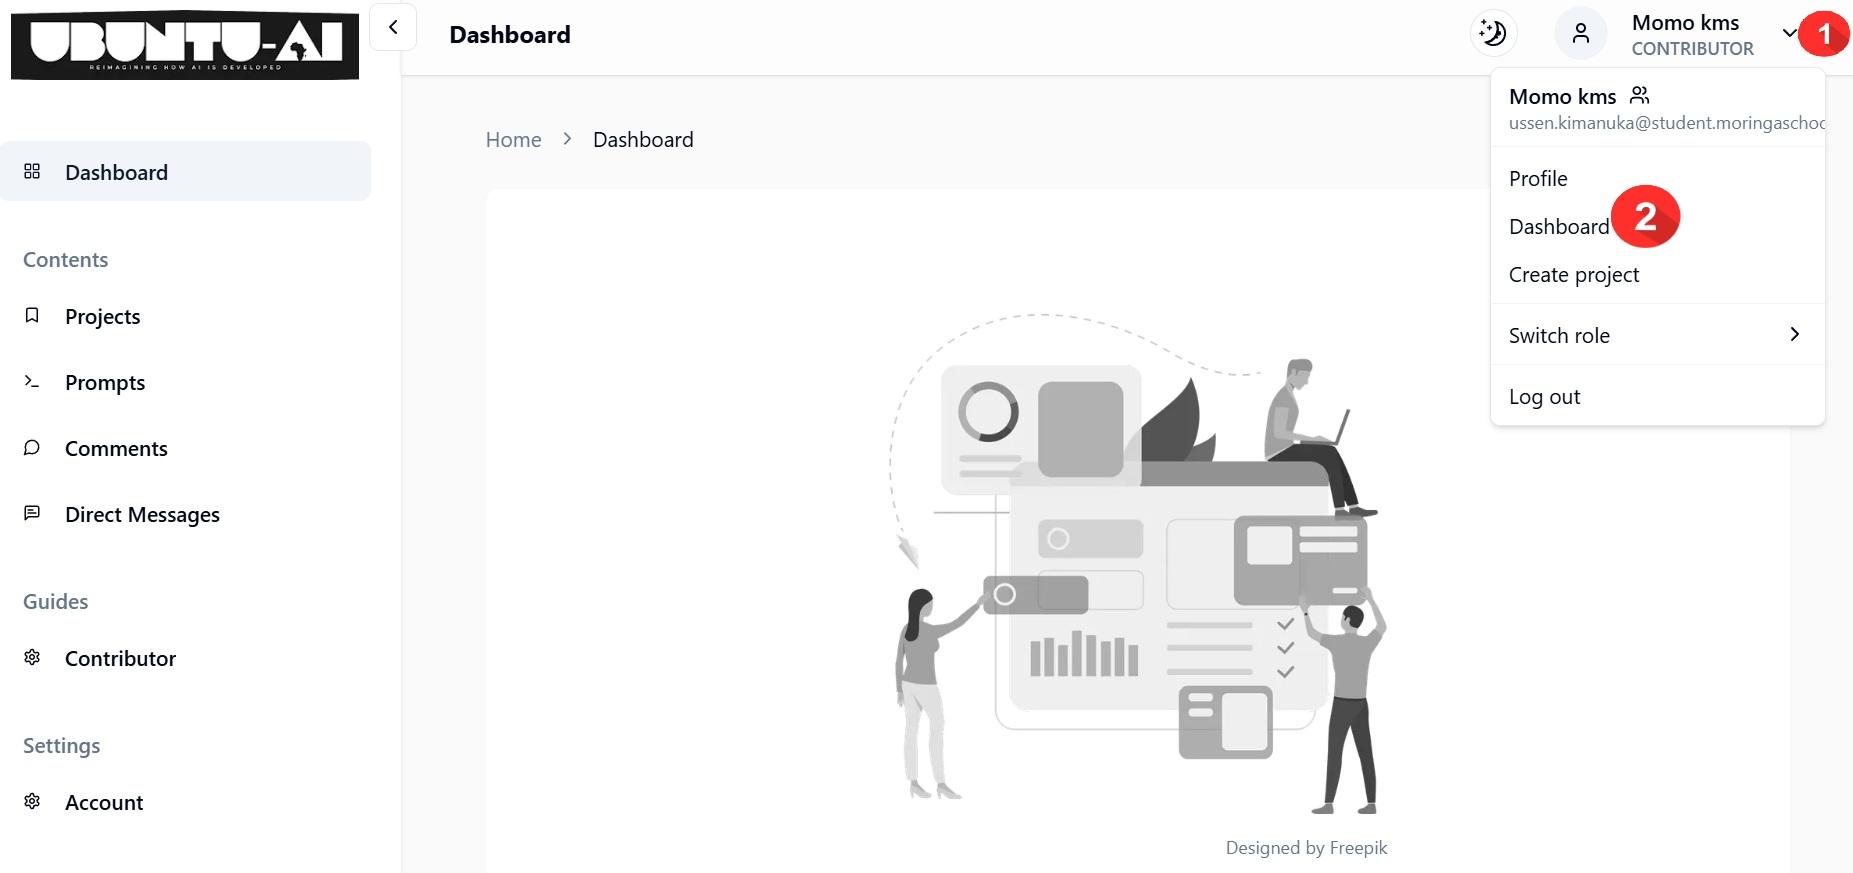
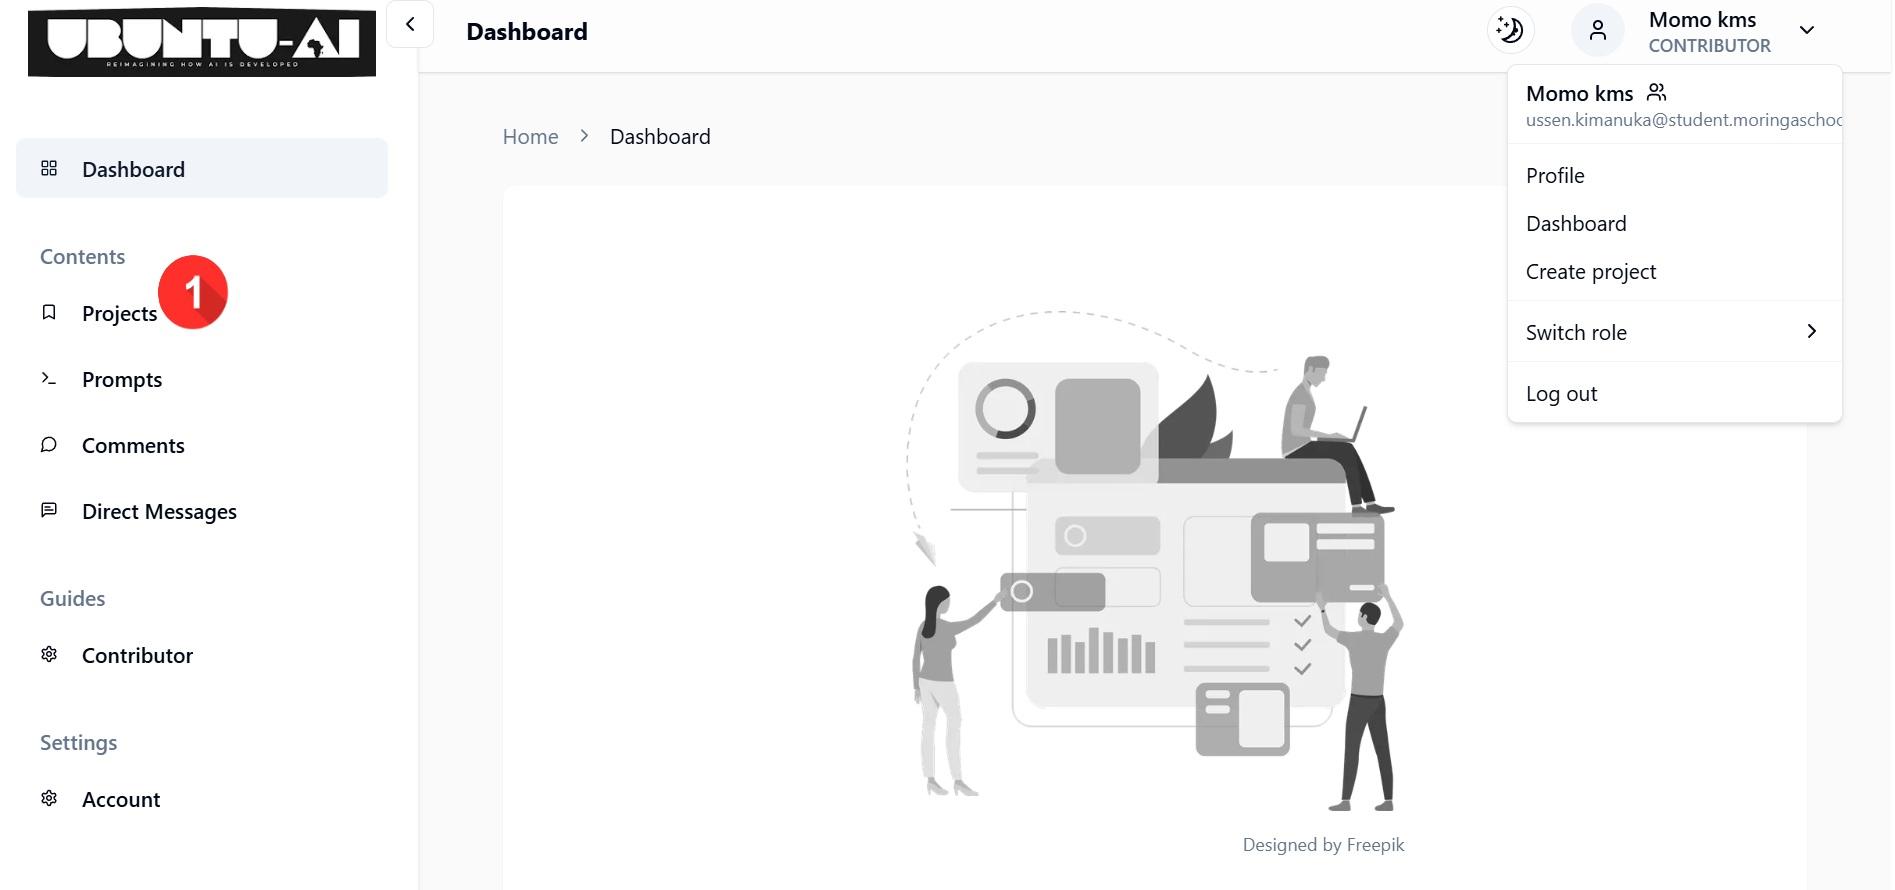
Upon successful registration and direct login, click the Dashboard button at the top right of the page
Step 4. Open your project view
Upon logging in, to upload your images, or create and edit your project later, click Projects
Step 5. Create your project
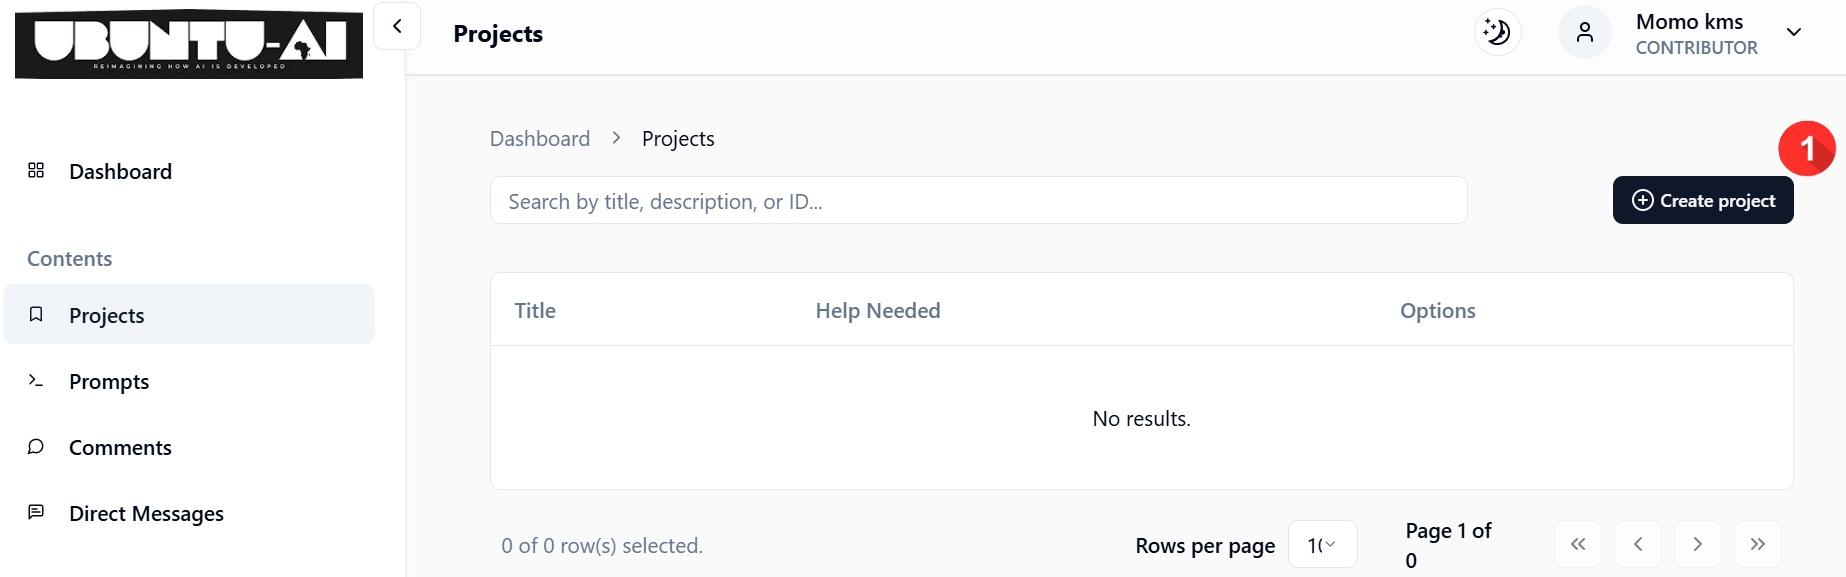
To create a new project, click the Create Project button. You can also navigate here to create a new project.
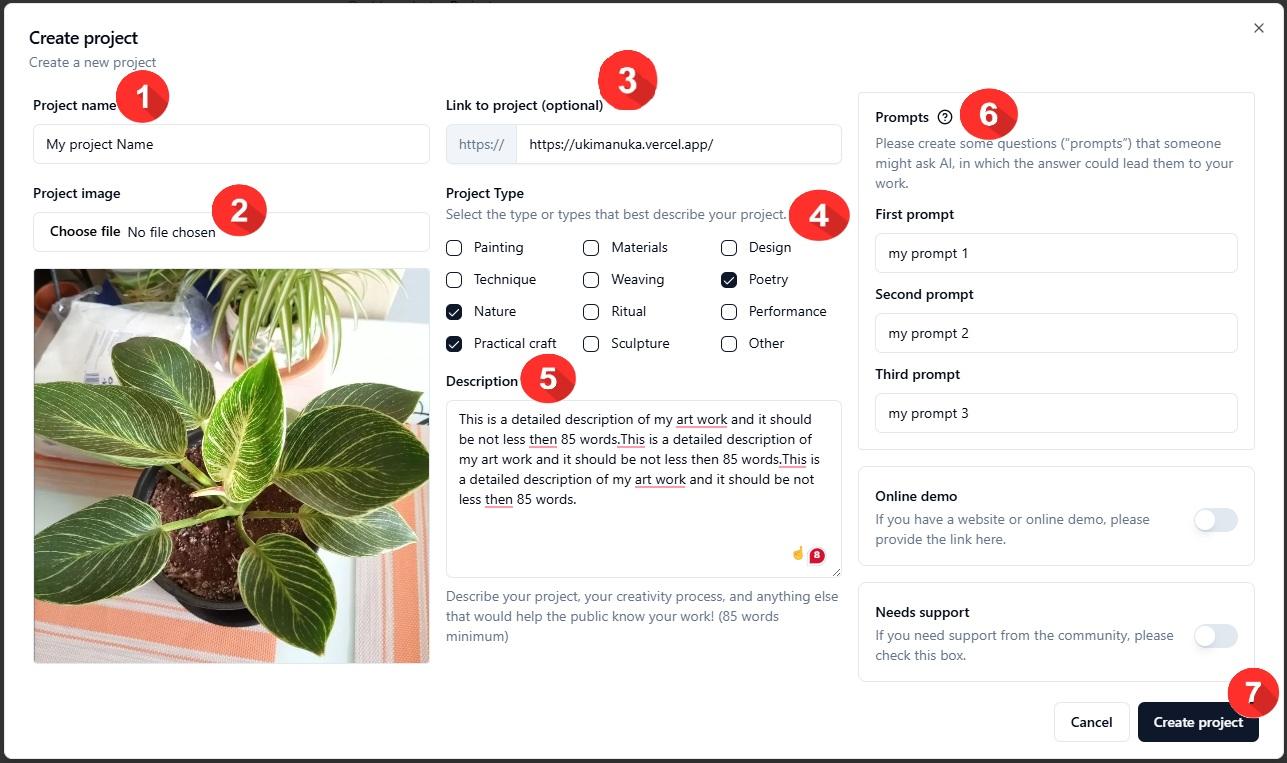
- A - Select all the different categories your project might fall under (not just one).
- B- Describe our artwork and yourself! The more details, the better. Who are you, how did you come to this practice?
- What process do you use to create your art or designs or crafts? You can see an example here.
- C - Upload the image of the work.
- D - Add prompts: short questions about your work. We keep these with your project. They are not shown on your public page today.
- E - Click on Create project button to submit your work.
Step 6. Edit your project
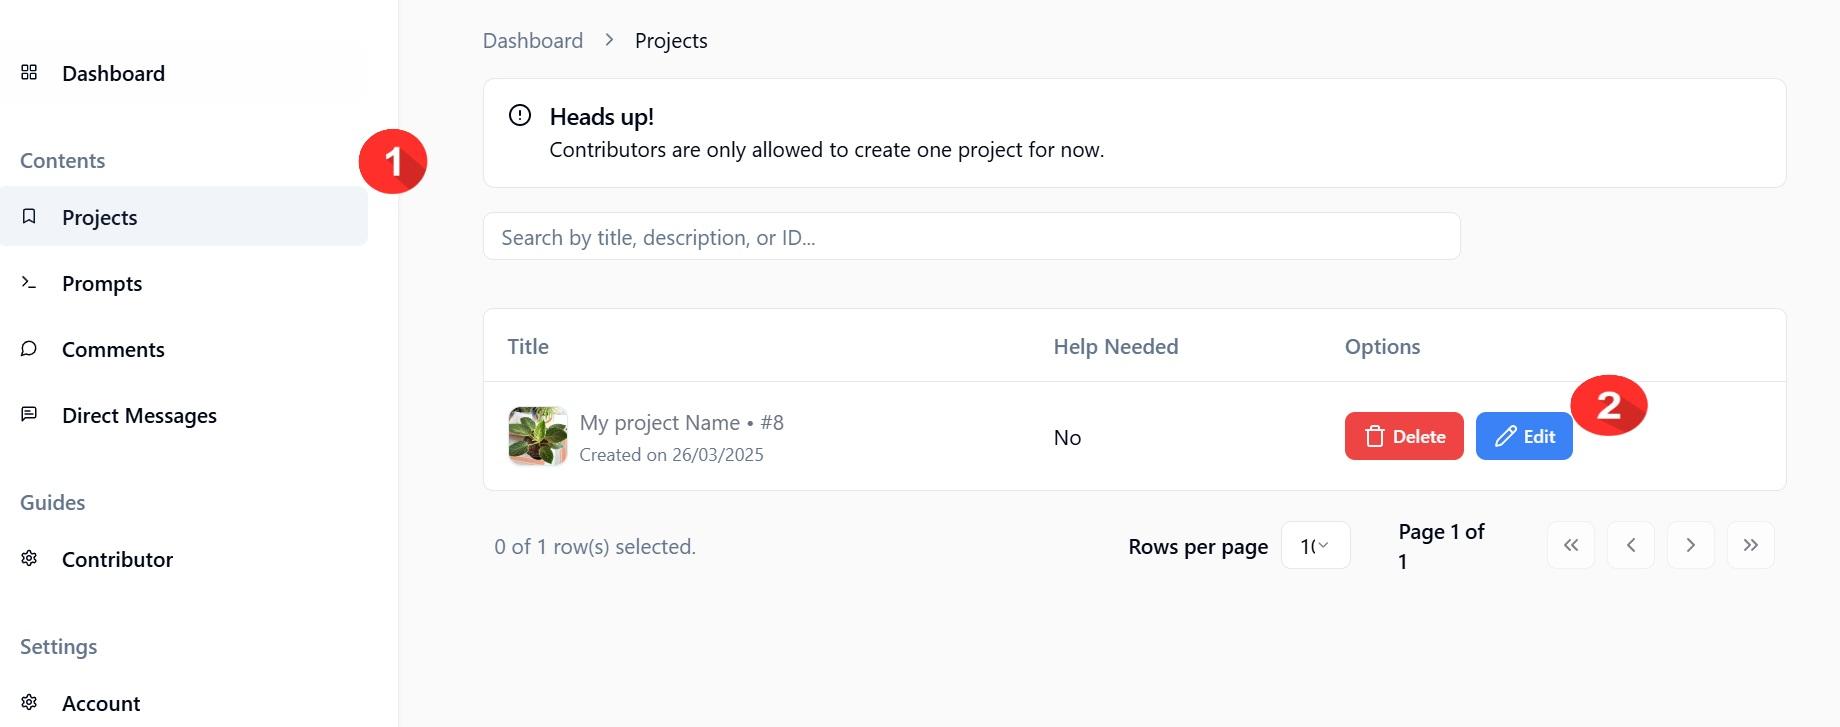
Upon logging in, to edit your project later, click Projects under your dashboard and navigate to the edit button.
Step 7. Create and edit prompts
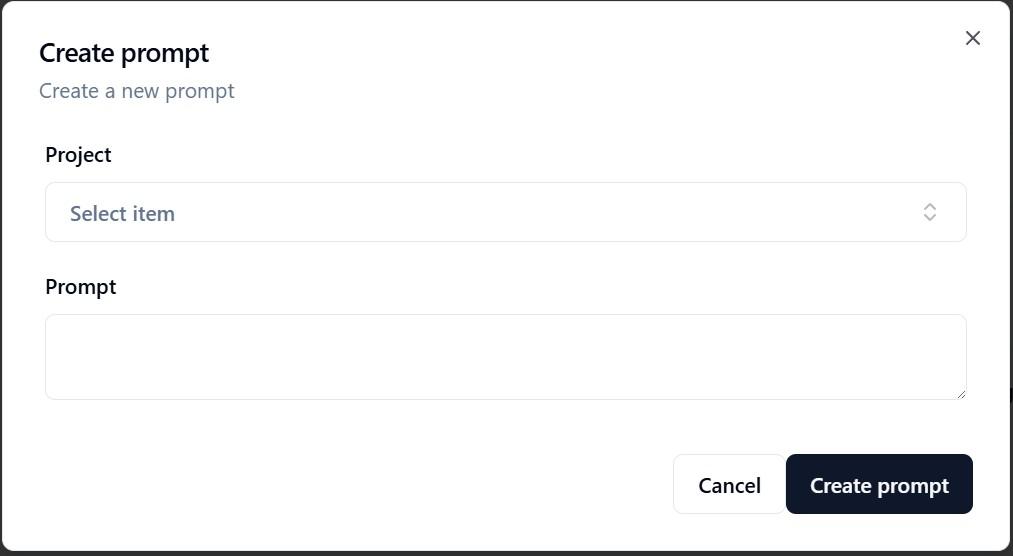
To create or edit prompts about your work, click Prompts in the left menu. We keep these with your project. They are not shown on your public page today.
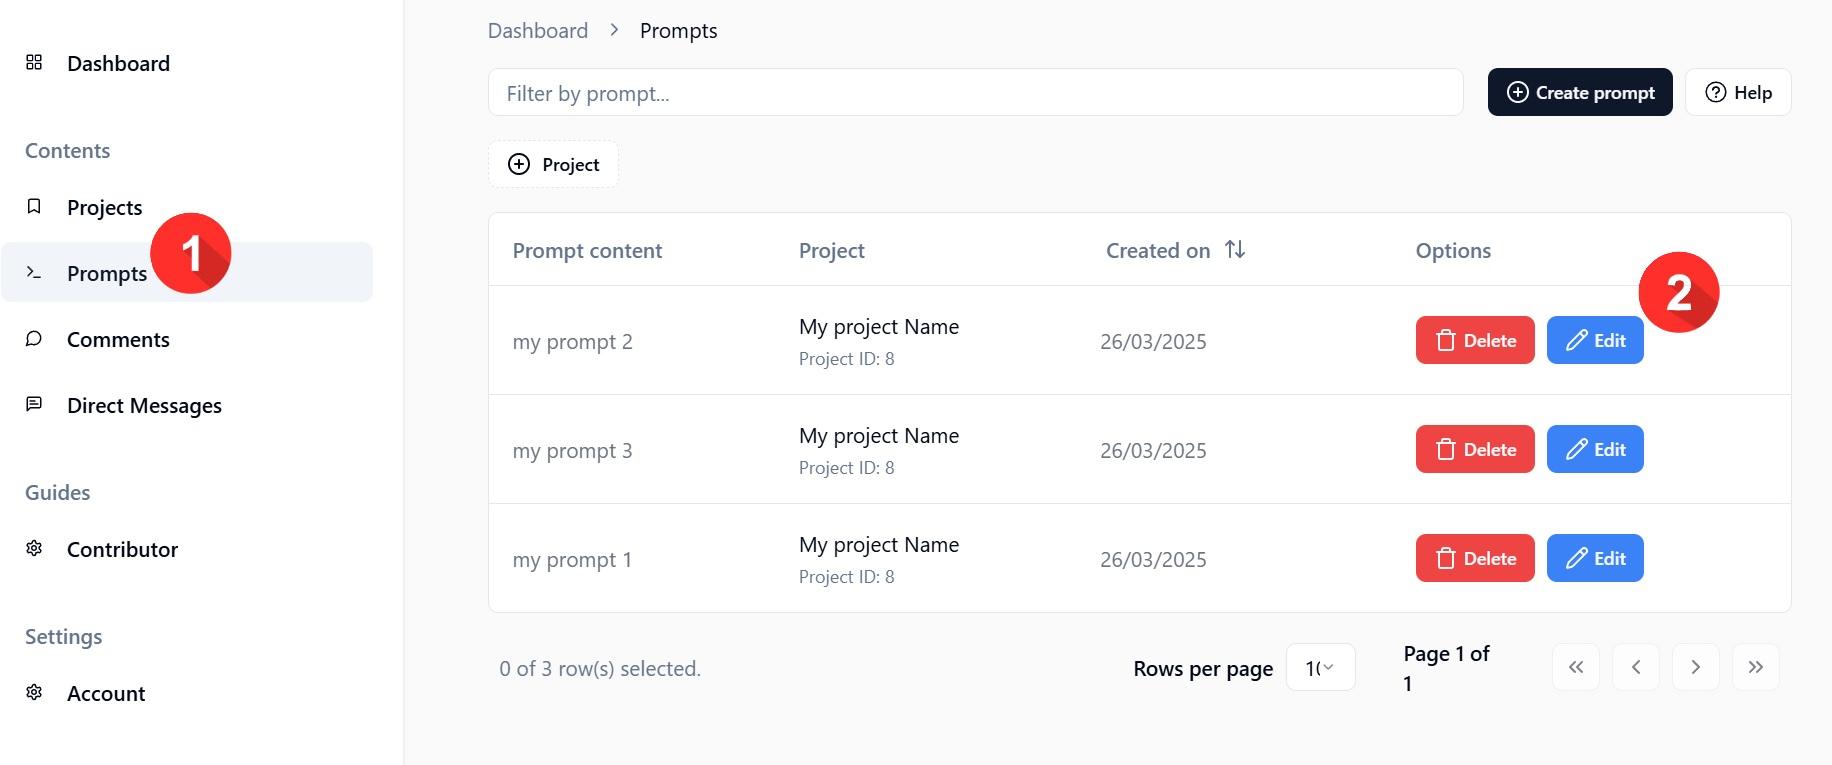
Enter the prompt details and submit.